



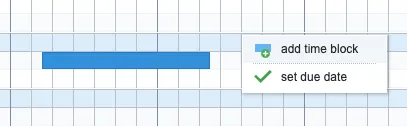
The colored bars in the rows are called time blocks in Ganttify. You can add time blocks to your schedule by right-clicking on the grid and choosing the option add time block.
Time blocks are also listed at the bottom of the Gantt chart in the legend. You can drag and drop these blocks onto the row of your liking to add a time block on that position as well.

By dragging and dropping on the left and right sides of the time block, you can change the start and end date and by dragging it from the center, you can reposition the entire block.

Already have a due date on a task? You don’t need to draw a new block. Right-click the due date and choose convert to time block. The checkmark becomes a time block, and you drag its edges to set the start and end date. To go back, right-click the time block and choose convert to due date. The video in Your first Gantt chart in Ganttify shows both conversions.