



Spotted a missing step while planning? Add it to Todoist without leaving your Gantt chart. Right-click a row to add a task, subtask, section or project, give it a name, and it lands in Todoist and on your chart at the same time, ready to plan. This is a new, experimental feature: switch it on for yourself in the Experimental features section of your account.
The video takes you from switching the feature on to adding a task, a subtask and a section, each one landing in Todoist and on your chart, in about a minute. The steps are written out below.
Show transcriptHide transcript
Switch on adding Todoist tasks in Experimental features
Don’t see these options in your right-click menu? Adding tasks from your chart is an experimental feature, so it stays off until you switch it on.
- Open your profile: click View profile under your name at the bottom of the menu, or go straight to your profile.
- Find the Experimental features section.
- Switch on Create Todoist tasks from your chart.
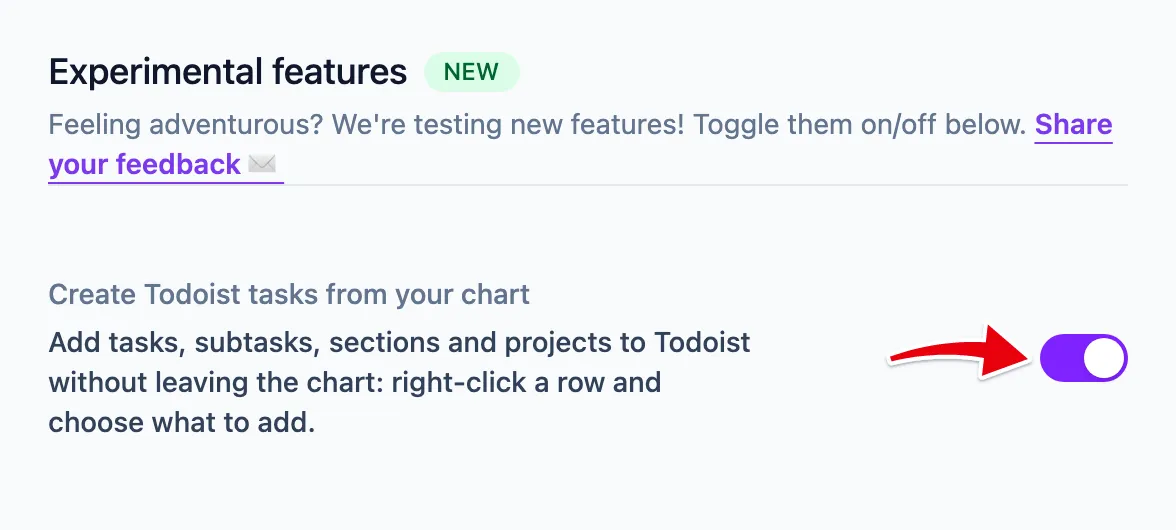
The switch only shows up once Todoist is connected to your account. It’s personal, too: on a chart you share with your team, each person who edits it switches it on for themselves. Update your Ganttify account has more about the account page.
Add a Todoist task, subtask, section or project
Open a Todoist chart and right-click the row you want to add something to. What the menu offers depends on the row:
- On a project row, the blue group header or an indented “Project:” row: Add task, Add section and Add project.
- On a section row: Add task and Add section.
- On a task row: Add task and Add subtask.
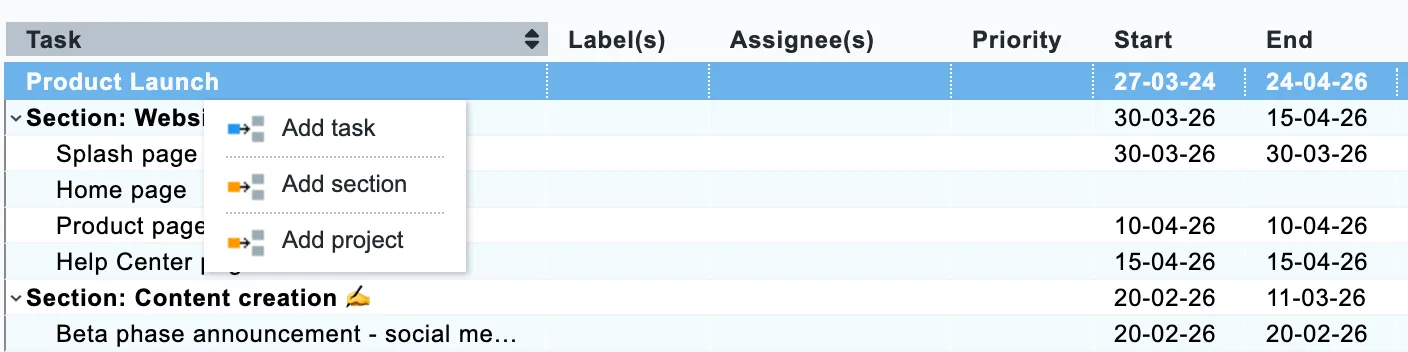
Choose one, and a new empty row appears where the item will live, with its name field already open. Type the name and press Enter to add it to Todoist. Click somewhere else with a name typed and it’s added too. Changed your mind? Press Escape, or leave the name empty, and nothing is added.
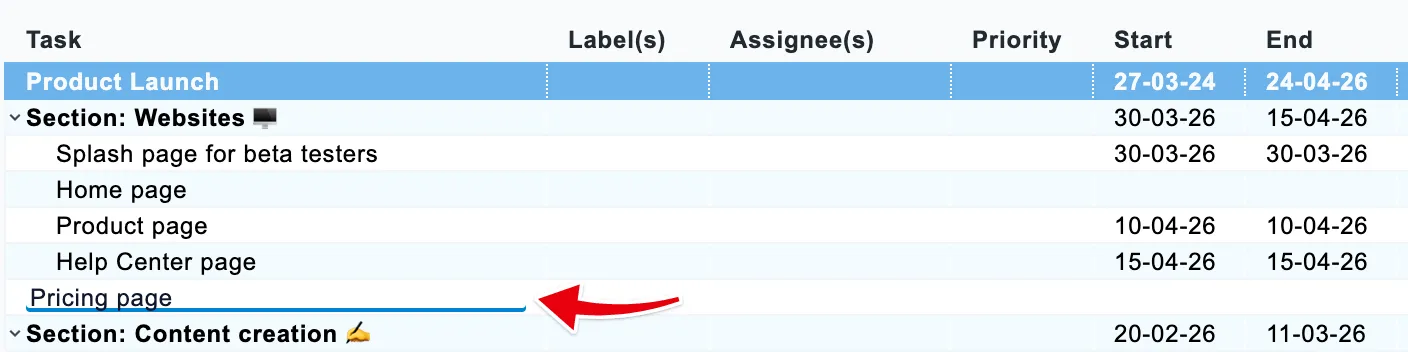
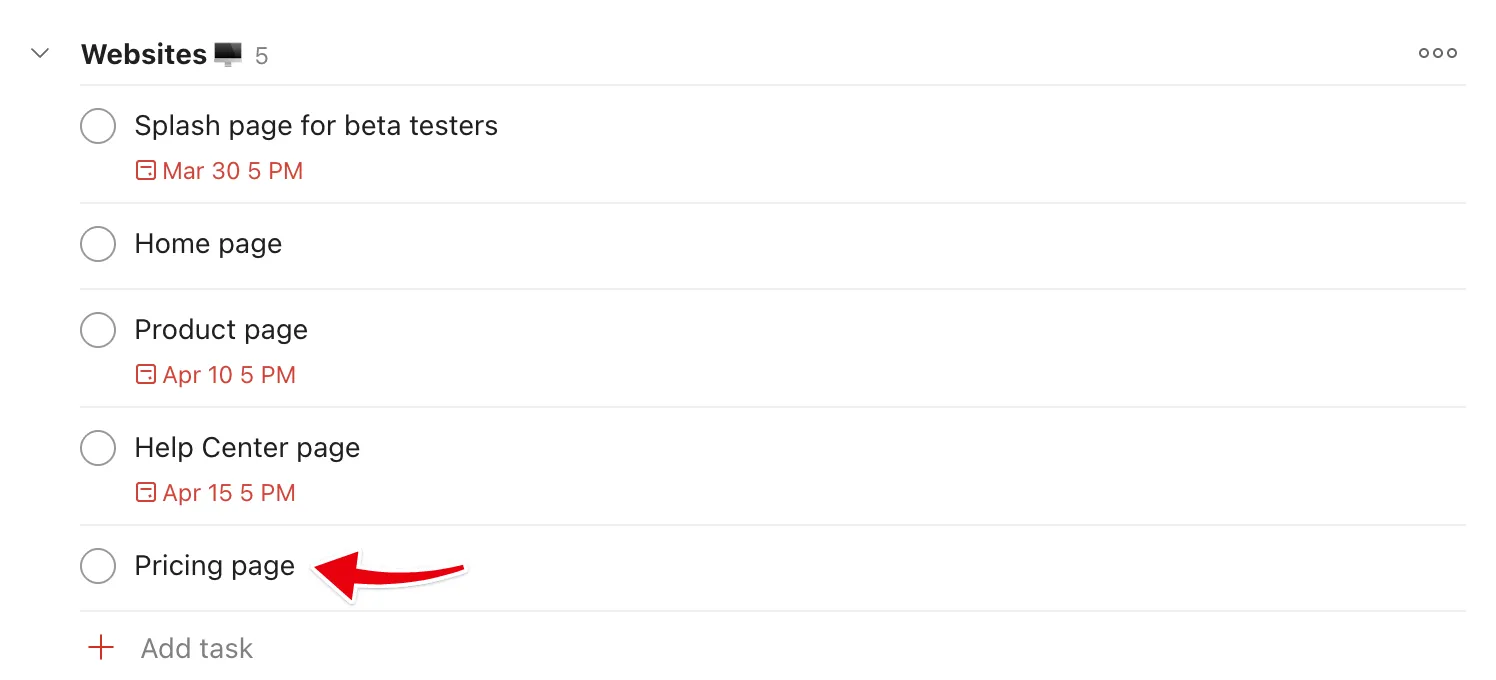
A notice reads “Adding task to Todoist…” (or section, or project) while it’s on its way, then “Task added”, followed by the name you typed and “is in Todoist.” From then on the new row works like any other: plan it, hide it or mark it complete.
Add a task with a keyboard shortcut
In the middle of planning and want to keep your hands on the keys? Select one row and press Ctrl+Enter (Cmd+Enter on a Mac) to add a task from it, just as Add task would. The shortcut isn’t listed in the menu, so it’s worth remembering.
Where new rows land
Everything you add goes to the bottom of where it belongs, in Todoist and on your chart alike, never in between existing rows. A task added from a task row goes to the end of that task’s section or list, and a subtask to the end of its parent’s subtasks. A task added from a section row goes to the end of that section, and one added from a project row to the end of the project’s tasks that aren’t in a section. A new section goes to the end of the project, and a new project to the end of the chart.
Give the new task its dates
A new task has no due date yet, so it shows up as an empty row on the timeline. Drag across the timeline in its row, or plan it the way you plan any other task, to give it dates. Time blocks explains how to add and adjust them, and once the task has dates you can connect it to other tasks with dependencies.
Why a new section needs a task to show on the chart
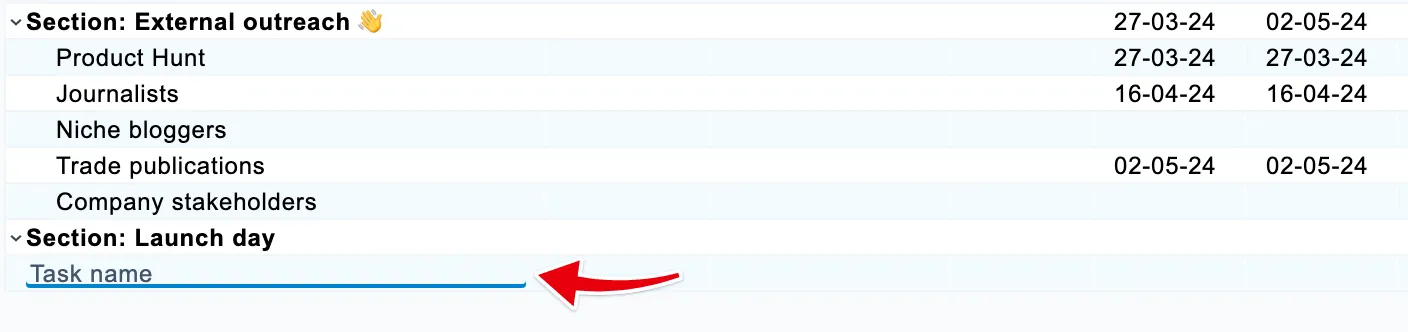
Right after you name a section, a task name field opens underneath it, and the notice reminds you that “Sections show on the chart once they contain a task.” That first task is what makes the section appear.
Add a new Todoist project
Choose Add project to create a new Todoist project and add it to your chart in one go. The chart then reloads with the new project in it.
Only the chart’s owner can add a project, and each new one counts toward your plan’s limit of projects per chart. When the chart is already at that limit, a message tells you it has the maximum number of projects.
Add tasks to a shared chart
When you share a chart with your team, everyone who can edit it can add tasks, subtasks and sections. They do it with their own Todoist account, so the Todoist project has to be shared with them in Todoist as well. If it isn’t, they see “This chart’s Todoist project isn’t shared with your Todoist account.” Editors don’t get Add project, and people who follow the chart read-only don’t see any of these options.
Working on the chart at the same time as someone else? The rows they add show up on your chart the next time you open or reload it.
If a task, section or project isn’t added
A name that’s too long keeps the name field open with a message telling you what to fix, such as “Keep the name to at most 500 characters.” for a task. Names can be up to 500 characters for a task, 2,048 for a section and 120 for a project.
If the row you started from was removed in Todoist in the meantime, the notice says so, for example “This task no longer exists in Todoist.” For anything else, the notice reads “Couldn’t add it” with a Try again button that reopens the name field with what you typed still in it.